Cetopo models can be downloaded and brought into your software, ready to use, in just a few clicks. Use our powerful tools to configure your model to include the information you need, and get started quickly.
Trusted by 250+ companies








Instant Access to highly accurate site models.

Design with confidence
using Real Data.
Intelligent algorithms combine information from 60+ sources, including governmental, to generate highly accurate models containing everything you need, in one place. Models are geo-located and include terrain, buildings, roads, trees, property information and grid lines.
What our users think
BIM Compatible models,
with dedicated plugins
for Archicad + Revit
Say goodbye to hours wasted wrangling with file types you can’t use. Cetopo provides fully editable native files for all widely used softwares, including AutoCAD, Rhino, Sketchup, 3DS Max and more.

Cetopo makes
visualisations easy.
Bring renders to life with real context. Cetopo offers access to world class orthophotos, Enscape tree families, and other features to help you create convincing images that will impress clients, and win bids.
Everything you need in one place.
Cetopo combines data from many sources into one easy to use platform, allowing you to get all of the information you need in one download. Configurable templates which are tailored specifically to the software you use allow for specification of detail level, content, visual style and more.
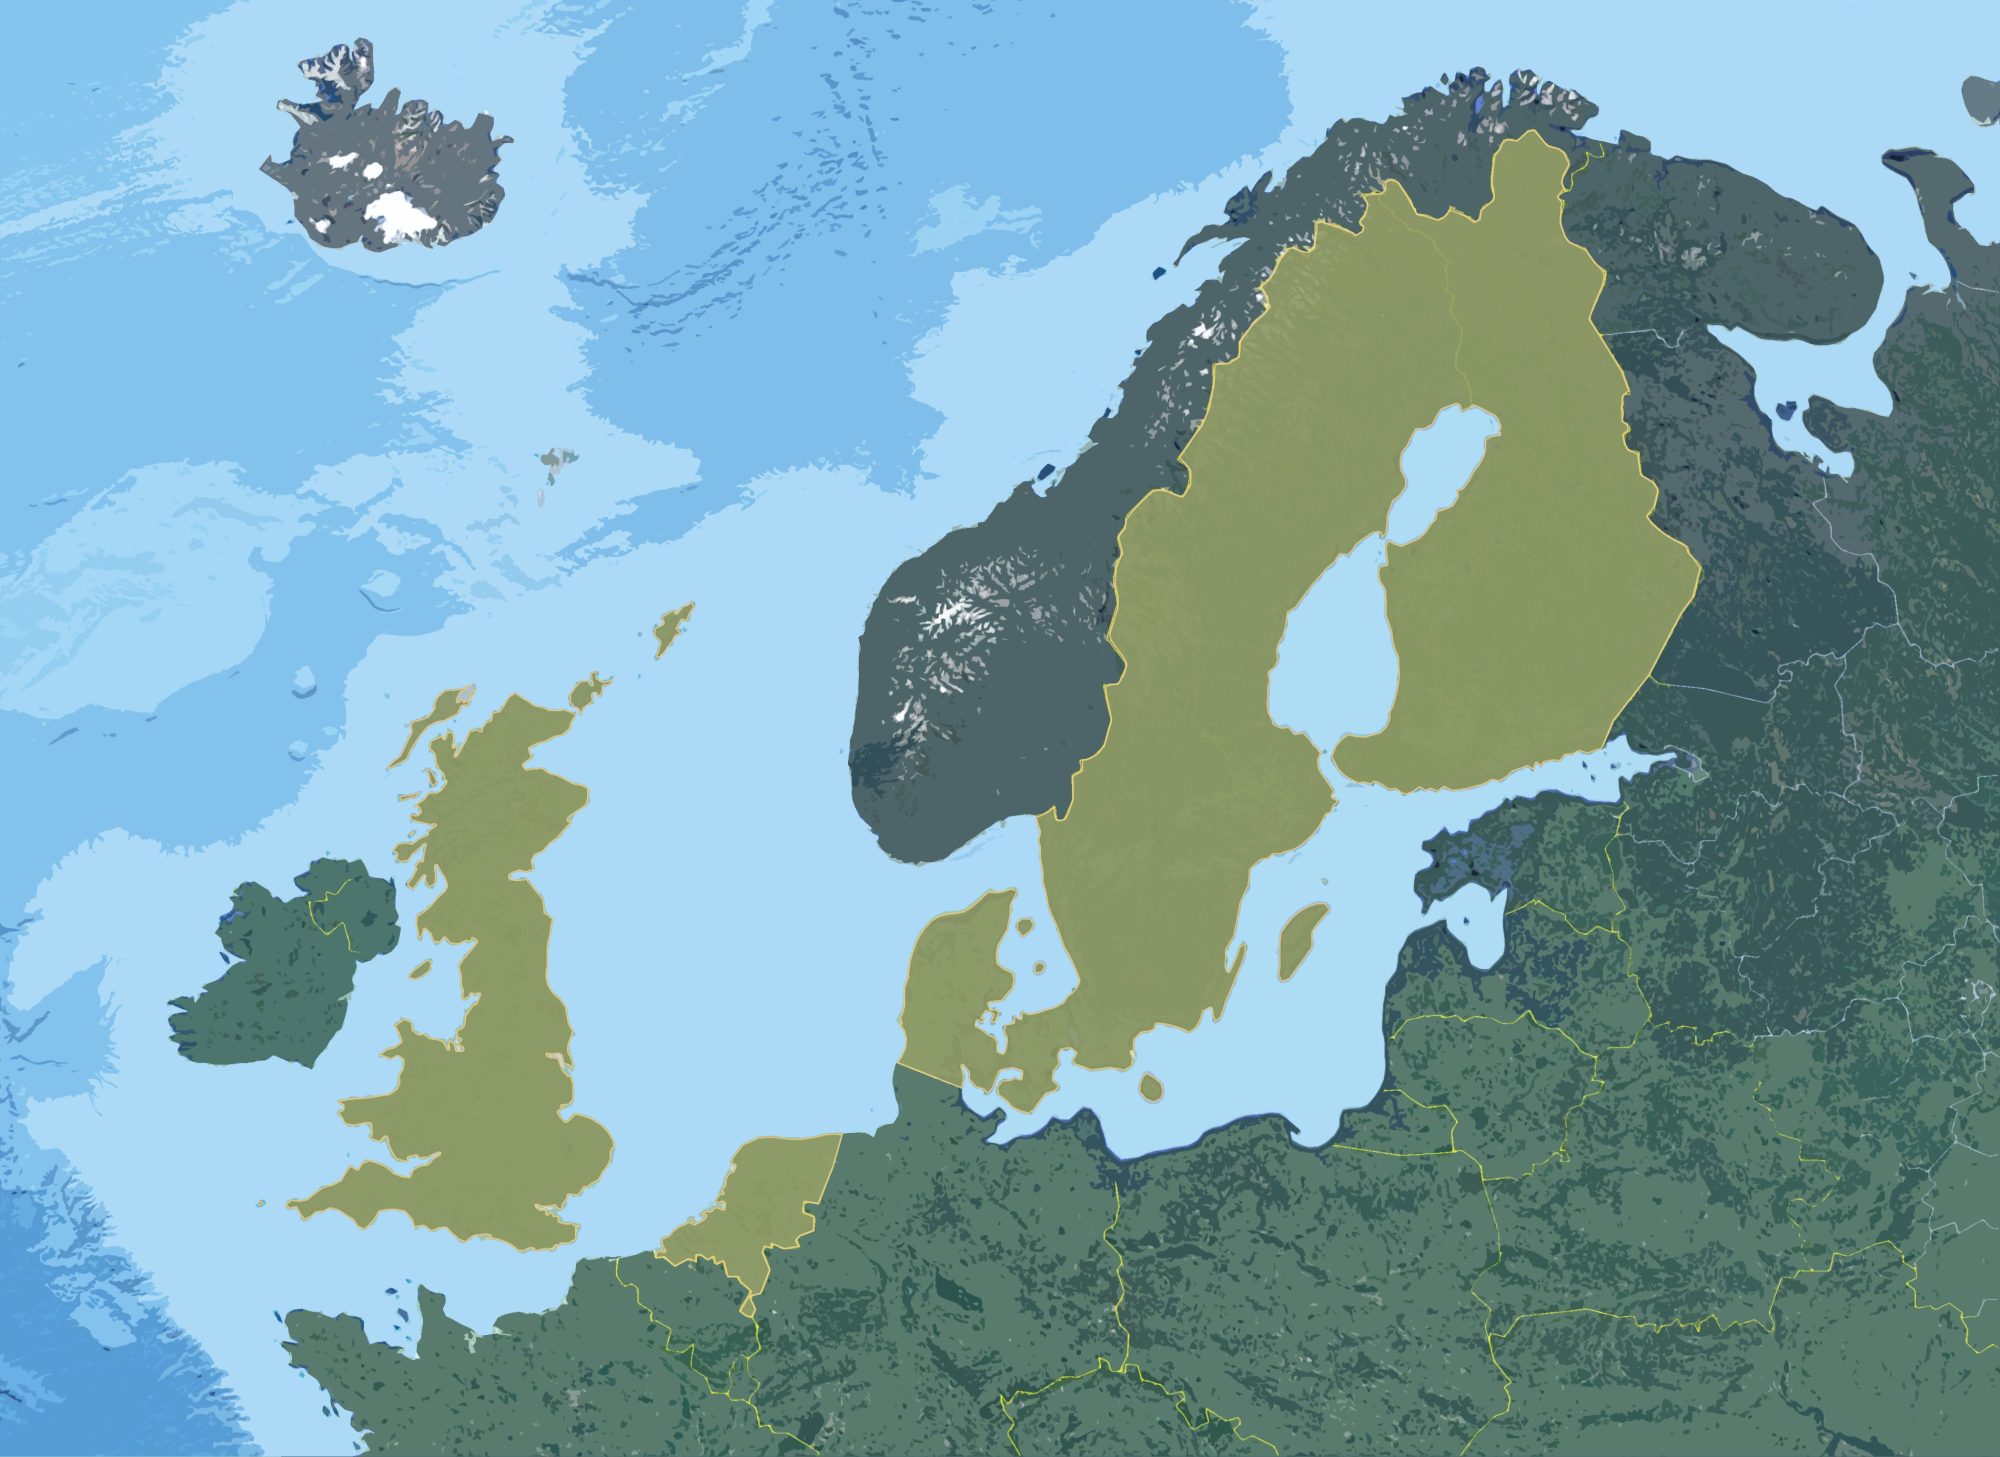
Available in 5 countries,
and growing.
Currently available in Finland, Sweden, Denmark, The Netherlands, and The UK, Cetopo is constantly expanding. We are always working on new areas, and intend to go wherever the data is great.
Our Partners
